Carmelita Bars Guide: Choosing Best Oats & Caramel for Perfection
Few desserts evoke the same sheer delight and universal acclaim as the mighty Carmelita Bar. These irresistible layered treats, featuring a chewy oat cookie crust, a luscious caramel filling, and a generous scattering of rich chocolate, have a reputation for being truly life-changing. But achieving that coveted perfection – the ideal balance of textures and flavors – hinges on some crucial ingredient choices. This comprehensive guide will walk you through the essential decisions, particularly focusing on how to choose the best oats and caramel, ensuring your homemade Carmelita Bars earn rave reviews every single time.
The Irresistible Allure of Carmelita Bars: A Classic Treat Redefined
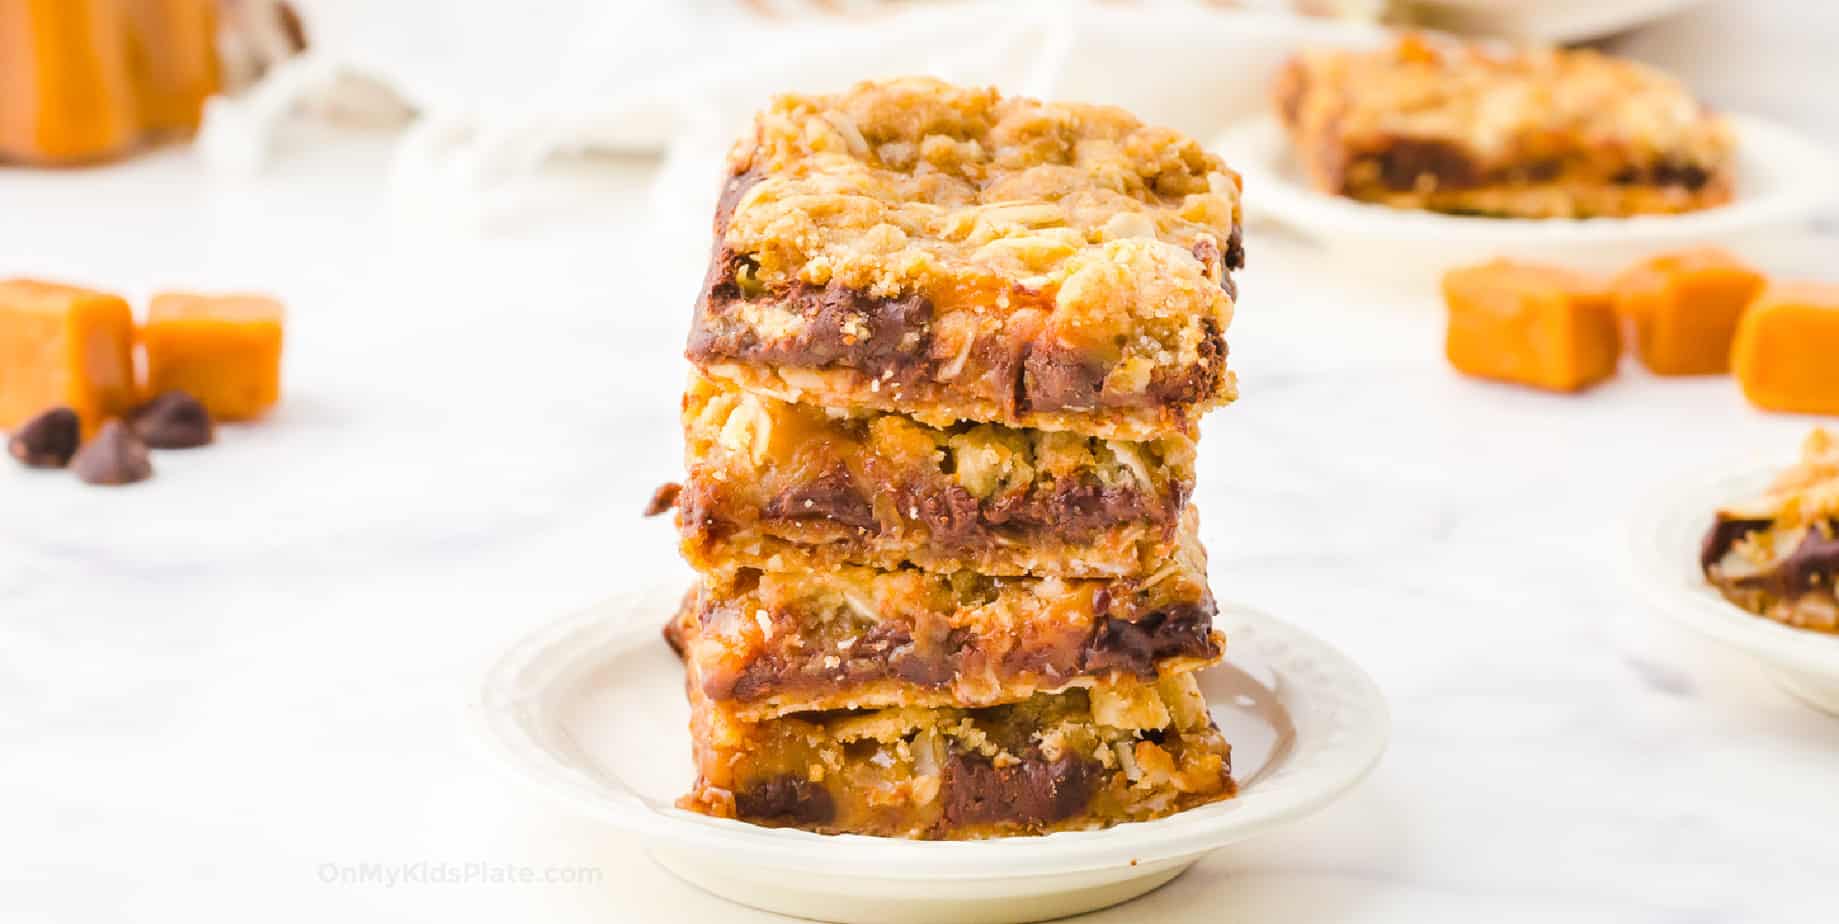
Imagine biting into a bar cookie that delivers a symphony of textures: the satisfying chew of an oat crust, the smooth, yielding pull of warm caramel, and the slight snap of melted chocolate. That’s the magic of Carmelita Bars. They’re more than just a dessert; they’re an experience. Despite their decadent profile, the beauty of Carmelita Bars lies in their relative simplicity. Many recipes require no stand mixer, making them an accessible project even for novice bakers. The result is a rich, buttery, and deeply satisfying treat that’s perfect for gatherings, holidays, or simply indulging your sweet tooth.
Their popularity isn't accidental. It's built on a foundation of contrasting elements that work in perfect harmony:
- Chewy, Buttery Oat Crust: Providing a robust base with a delightful chew.
- Soft, Gooey Caramel: The molten heart that holds everything together.
- Generous Layer of Chocolate: Adding a touch of bitterness to balance the sweetness.
While the overall process is straightforward, paying attention to specific ingredients can elevate your bars from good to truly extraordinary.
Decoding the Perfect Oat Crust: Why Your Choice of Oats Matters
The foundation of any exceptional Carmelita Bar is its crust. This isn't just a vehicle for the caramel and chocolate; it's an integral part of the flavor and textural profile. And when it comes to the oats, there's a clear winner.
The Oats Debate: Old-Fashioned Rolled Oats vs. Quick-Cooking/Instant
This is perhaps the most critical decision for your crust's texture. For Carmelita Bars, old-fashioned rolled oats are non-negotiable. Here's why:
- Structural Integrity: Rolled oats are whole oat groats that have been steamed and flattened. This minimal processing means they retain their shape and integrity even when baked into a dough. They provide that characteristic chewy, slightly toothsome texture that defines a perfect Carmelita crust.
- Texture Contribution: When baked, rolled oats contribute a distinct, hearty texture. They don't disappear into the dough but stand out, offering a pleasant chewiness that contrasts beautifully with the soft caramel.
- Flavor Depth: Their less-processed nature often means a slightly richer, nuttier oat flavor that enhances the overall taste of the bar.
Avoid instant or quick-cooking oats at all costs. These oats are pre-cooked, dried, and then cut into smaller pieces. While convenient for a quick breakfast, their fine texture and pre-cooked state mean they will break down completely in your bar dough. This will result in a crumbly, often mushy, and less flavorful crust that lacks the signature chewiness.
Beyond Oats: The Supporting Cast of the Crust
- Flour: All-purpose flour is standard, providing structure. However, for a deeper flavor profile and a slightly denser crumb, consider a 50/50 mix of all-purpose and whole wheat flour. The whole wheat adds a lovely earthiness.
- Brown Sugar: Light or dark brown sugar both work beautifully, contributing moisture and a rich, molasses-like sweetness that complements the oats and caramel. Dark brown sugar will lend a slightly more pronounced molasses flavor.
- Butter: High-quality butter (melted for easy mixing) is essential for richness and binding the crust ingredients. While unsalted is often preferred for baking to control salt levels, salted butter can also be used if that's what you have on hand – just be mindful of any additional salt in the recipe.
- Baking Soda & Salt: These aren't just for leavening; baking soda contributes to the crust's tender texture and browning, while salt balances the sweetness and enhances all the other flavors.
Crafting the Gooey Heart: Selecting the Ideal Caramel for Carmelita Bars
The caramel layer is the gooey, luscious soul of your Carmelita Bars. Its consistency and flavor are paramount, and choosing the right type of caramel is a decision that can make or break your dessert.
The Caramel Conundrum: Soft Candy Caramels vs. Hard Candies vs. Jarred Toppings
The goal for Carmelita Bars is a caramel that remains soft and chewy once cooled, allowing for easy slicing and a delightful eating experience. This immediately rules out one common type:
- Soft Candy Caramels (e.g., Kraft, Werther's Chewy Caramels): This is the go-to choice for classic Carmelita Bars, and for good reason. These caramels are specifically formulated to melt smoothly with cream and then re-solidify into a wonderfully soft, pliable, and chewy texture when baked. They retain their gooeyness even after the bars have cooled, ensuring that every bite is perfectly yielding. Yes, unwrapping a bag can be a minor chore, but the results are undeniably worth it.
- Hard Candy Caramels: Absolutely do not use hard candy caramels. While they might melt down in the saucepan, they are designed to be hard at room temperature. Once your Carmelita Bars cool, these will re-solidify into an unpleasantly hard layer, making the bars incredibly difficult, if not impossible, to chew and enjoy.
- Jarred Caramel Toppings (e.g., Mrs. Richardson's Caramel Topping): These offer unparalleled convenience and can certainly be used. They provide a quick and easy way to get a caramel layer into your bars. However, it's important to note that the texture of jarred caramel topping might be slightly softer and more liquid-like compared to the chewy, substantial bite achieved with melted soft candy caramels. Some prefer this smoother consistency, while others find it less "chewy" than the traditional version. Experiment to see which you prefer!
The Role of Cream and Chocolate
- Heavy Cream: When melting soft candy caramels, heavy cream (or whipping cream) is crucial. It thins the caramel slightly, making it pourable, and contributes to its silky-smooth consistency. It also helps prevent the caramel from seizing or becoming too stiff.
- Chocolate Chips: The chocolate layer is a crucial counterpoint to the sweetness of the caramel.
- Semisweet Chocolate Chips: This is the classic choice and offers a perfect balance. Its moderate sweetness and slight bitterness provide an ideal contrast to the rich caramel and oat crust.
- Dark Chocolate Chips: For those who prefer a less sweet dessert, dark chocolate (60% cocoa or higher) is an excellent alternative. It adds a more intense chocolate flavor and a sophisticated bitter note that cuts through the richness beautifully.
- Milk Chocolate Chips: While some recipes might suggest milk chocolate, it's generally not recommended for Carmelita Bars. The bars are already incredibly rich and sweet, and milk chocolate, with its higher sugar content, can push them into an overly cloying territory. If you insist on milk chocolate, perhaps consider mixing it with an equal amount of semisweet or dark chocolate to temper the sweetness.
Beyond the Basics: Expert Tips for Carmelita Bar Perfection
Once you’ve nailed your ingredient choices, mastering the technique ensures a flawless batch of fool-proof Carmelita Bars.
Smart Pan Preparation
Always, always line your baking pan with parchment paper or foil, leaving an overhang on the sides. This simple step makes removing the cooled bars incredibly easy and cleanup a breeze. Without it, you risk a sticky, messy extraction and potentially ruined bars.
Pressing the Crust
When pressing the bottom oat crust into the pan, ensure it's packed tightly and evenly. This creates a sturdy foundation that won't crumble when sliced and provides a consistent texture throughout the bar. A flat-bottomed measuring cup or the palm of your hand works well for this.
Layering with Care
The layering process is straightforward: bake the bottom crust, sprinkle chocolate chips, drizzle caramel, then top with the remaining oat mixture. Don't stress too much if the top oat layer doesn't completely cover the caramel; small gaps are perfectly normal and part of the rustic charm of Carmelita Bars.
The Art of Baking
Keep an eye on your bars during the final bake. You're looking for a golden-brown top crust and bubbling caramel. Overbaking can lead to a dry crust and overly hard caramel, so follow recipe times closely, but trust your eyes and nose.
Patience is a Virtue: Cooling and Slicing
This is arguably the hardest part! Carmelita Bars need to cool completely – ideally for several hours or even overnight – before slicing. Attempting to slice them warm will result in a gooey, unmanageable mess. Once cooled, the caramel will set, and you'll be able to cut clean, neat squares. Because they are so rich, smaller slices are often preferred.
Customization and Flair
- Sea Salt Finish: A sprinkle of flaky sea salt over the top of the finished bars (especially after cooling) beautifully enhances the caramel and chocolate, adding a sophisticated sweet-and-salty dimension.
- Nuts: Toasted chopped pecans or walnuts can be added to the bottom crust mixture or sprinkled over the chocolate layer for extra crunch and nutty flavor.
- Espresso Boost: A teaspoon of espresso powder added to the chocolate chips (or even a little in the caramel) can deepen the chocolate flavor without making it taste like coffee.
- Different Extracts: A dash of almond or even a hint of rum extract in the caramel can add another layer of flavor complexity.
Storage Tips
Carmelita Bars keep well in an airtight container at room temperature for 3-4 days, or in the refrigerator for up to a week. They also freeze beautifully for longer storage.
Carmelita Bars are more than just a recipe; they are a canvas for delicious indulgence. By understanding the critical role of your chosen oats and caramel, and by implementing these expert tips, you’re not just baking a dessert—you're crafting a truly memorable experience. Get ready for an outpouring of compliments and requests for the recipe!
